Wallet security and keeping private keys safe is the most important part of any crypto application/platform's infrastructure. If the private key of your crypto wallet is stolen, you will lose your funds. And if you lose the private key, the digital coins under that wallet are lost forever. How about, if owner of crypto funds die, how will anyone inherit his assets - if they don't have access to that wallet? That's why we would like to guide you through this tutorial, where we will present to you; how to authorize another user/family member, someone you trust completely.
Trenton Kennedy is a communications manager at blockchain analytics company Chainalysis. He pointed to this 2020 blog post when asked to share data on the amount of Bitcoin that may have been lost forever for various reasons, including death.
According to the blog, 20% of all Bitcoin in circulation have been lost, may be forever. That’s the equivalent of 3.7 million BTC, valued at $75 billion at current price rate.
Matthew Mellon passed away in 2018. His death was unexpected and, while he was assumed to be worth around $200 million, most of that money was in cryptocurrency. He hadn’t shared his access keys to that currency with anyone, so no one could get to it.
As being said, this guide will teach you how to authorize another user, so that he/she becomes co-owner of your account. This will also mitigate the risk of loosing private key as well as being compromised.
Watch video tutorial if it is easier for you to follow.
In this case, we are going to use WebAuth for Web.
Step 1
Log into an existing account by logging in with your mobile device.
Step 2
Once you're logged into an existing account, you will need to set up a device key to authenticate transactions and actions.
Step 3
Click Add new device and choose authentication method:
In our case, we will select Touch ID and approve it.
You will be prompt:
"Do you want to save a passkey for "debian"? Passkeys are saved in your iCloud Keychain and are available for sign-in on all your devices."
You can also save on another device if you want.
Important: Deleting browser data, will delete your Touch ID key, so it is critical to back up your seed phrase and/or private key.
Step 4
Enter Device Name (Public) and click Add device.
Step 5
Sign in and you are ready to go.
Step 1
Open WebAuth.com, where you already added your account.
Step 2
Open another Tab and navigate to protonscan.io.
Step 3
Login by choosing WebAuth for Browser and Authorize.
Step 4
Click on Wallet down below, then Menu and select Keys and Permissions.
Step 5
Click on Advanced and select Active permission (you can also change Owner permission).
By default Proton wallet has 2 native permissions (Owner and Active):
Step 6
Add account name and permission (active). Scroll up and hit button to save it.
Step 7
Sign this action and check if permission has been updated.
We can see that @alvosec account is now authorized with active permission.

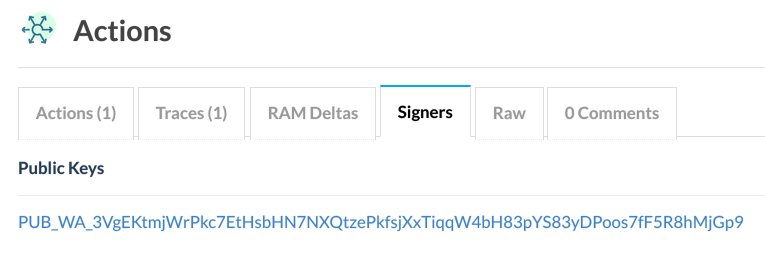
If we click on TX, we will see under Actions signer public key, which we created before by adding new device in WebAuth.com.

If you have any questions, feel free to ask us.
Stay safe!