WARNING: The content of this article are for testing purposes or it can be used to investigate fraudulent websites. Any actions taken based on the information provided here are at the reader's own risk.
Reverse proxy services like Cloudflare can improve a website's speed and security by adding an additional layer of protection. This also provides a level of anonymity, as the hosting provider and other information about the website are concealed.
With a reverse proxy service in place, it becomes challenging, or even impossible, for external parties to determine the website's hosting provider. This anonymity allows content owners to conceal the source IP address of their server and safeguard it from potential attacks.
Finding the actual hosting provider of a website using a reverse proxy service like Cloudflare requires searching for evidence of past or current misconfigurations. It is crucial to understand the ways a website owner might leave behind a trail and, if you are the site owner, to take measures to maintain anonymity. For instance, the original web server's IP may have remained unchanged or unsecured, which could indicate that the hosting provider has not been altered. In the case that the IP was changed, it's possible that the hosting provider's IP neighborhood remained the same before transitioning to use Cloudflare as a front end.
Check the website’s DNS records: The first step is to look at the domain name system (DNS) records of the website in question. These records contain information about the website’s IP address, and you can use online tools like Whois or Dig to look them up. If you see multiple IP addresses listed, it’s likely that one of them belongs to the real website host, while the others are Cloudflare’s IP addresses.
dig example.com
or try to lookup for MX records:
dig mx example.com
First you need to locate all subdomains which can be achieved by brute-forcing subdomain names. You can use Nmap with script:
nmap --script dns-brute example.com
or you can simply use any tool available to enumerate subdomains:
dnsenum example.com
A highly effective method of obtaining subdomains is through enumeration using the Certificate Transparency logs stored by Censys. Remember to check for SANs - Subject Alternative Name.
Finding the real IP behind a web application involves determining the actual network location of a server hosting the website, as opposed to the domain name or URL used to access it. This can be accomplished through fuzzing method.
example.com/cpanel try on port 2083
Anything that works on different port can expose IP address, search for any third party application that is listening on different port.
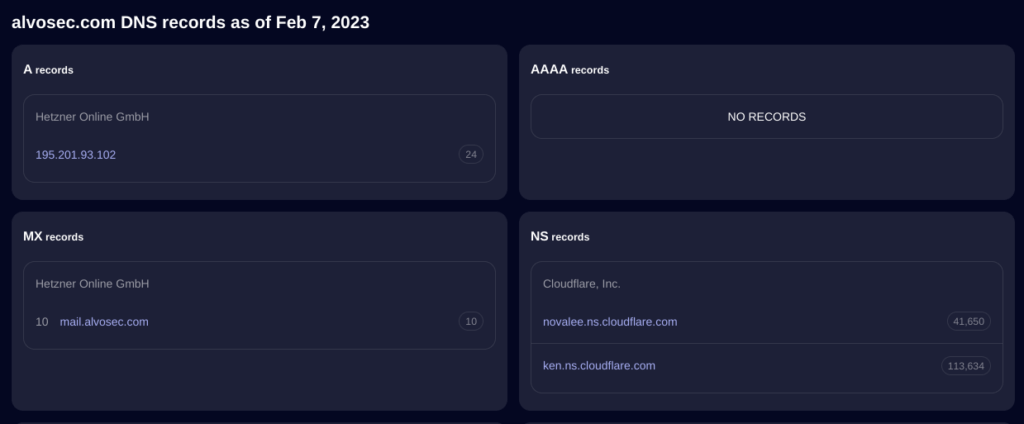
Examining the domain history can also be beneficial, as sometimes the NS records are redirected to Cloudflare without altering the hosting provider.
Another possibility is to use something like Securitytrails to check a domain's DNS history.
Discovering an IP address can be done by using pingback XMLRPC calls. The pingback feature in WordPress allows a website to notify another website that it has linked to it. The notification is sent via an XMLRPC call to the target website, which can reveal its IP address.
Copy and paste the following template into the XML content text area of this website or save it as a file ping.xml.
<?xml version="1.0" ?>
<methodCall>
<methodName>ping</methodName>
<params>
 <param>
  <value>
<string>http://<IP>/</string>
  </value>
 </param>
 <param>
  <value>
<string>https://site.com/</string>
  </value>
 </param>
</params>
</methodCall>
Execute the following command: Replace 'https://example.com/xmlrpc.php' with the pingback URL from the beginning of this section, and use 'ping.xml' as the relative path to the file you just created.
curl -X POST -d @ping.xml https://example.com/xmlrpc.php
In an empty terminal window, execute the following command. It will wait for a connection from the target WordPress server. The 'sudo' command is required because the port being listened on is <= to 1024, which are reserved for root/admin access only.
sudo netcat -v -l -p 80
Once the command (curl) has been executed, wait for a short period for the data to appear in your netcat session. You should see something like this:
GET /hello/world HTTP/1.1
Host: 10.0.0.1
User-Agent: WordPress/6.1.1; http://example.com
Accept: */*
Accept-Encoding: deflate, gzip, br
Referer: http://10.0.0.1/hello/world
X-Pingback-Forwarded-For: 127.0.0.1
Connection: close
There are other methods for revealing the IP address hidden by Cloudflare, but they will be explained in a different article.