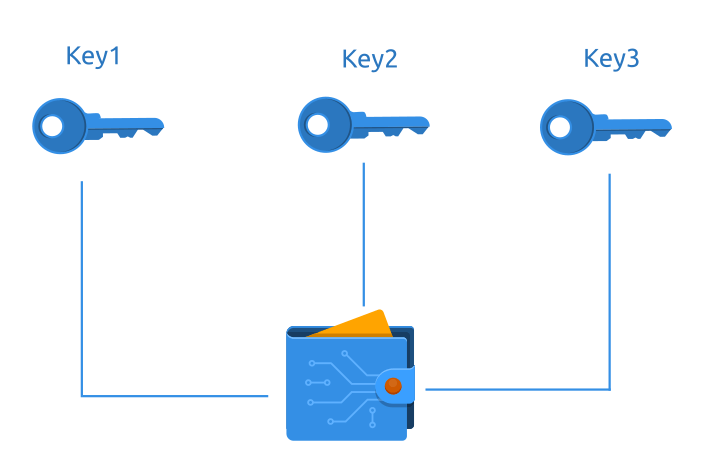
A MultiSig wallet is a digital wallet that operates with multisignature addresses. This means that it requires more than one private key to sign and authorize a crypto transaction or, in some cases, that several different keys can be used to generate a signature.
From a security perspective, it is vital that coins and tokens are stored in a way that eliminates the risk associated with a single vulnerable point that can compromise the entire wallet. If only one private key is necessary to sign a transaction, this presents a major risk to your assets in case of theft or loss.
Multi-signature means it is possible to require multiple people to authorize certain actions in the account.
In our example we will be learning, how to create multisignature wallet based on XPR Network blockchain technology.
We advise anyone to follow this tutorial by creating account in testnet environment, before moving to mainnet.
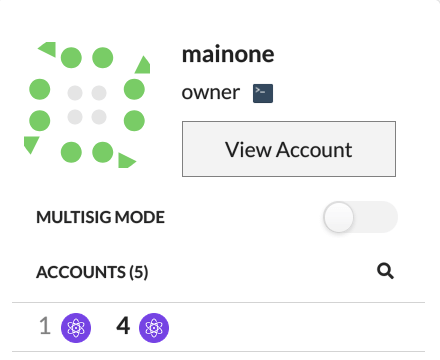
Let’s go ahead and look up our account through explorer.xprnetwork.org. Log in with account that you want to convert to msig account.
Navigate to Wallet - Keys and Permissions and choose Advanced mode.
By default XPR wallet has 2 native permissions:
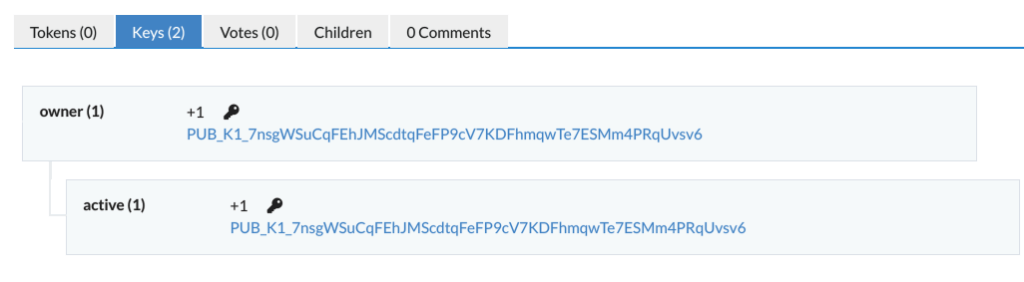
Each permission has one key associated with it. Each key associated with a permission has a certain weight, and each permission has a certain weight threshold which needs to be met before a transaction requiring that permission is approved.
Now let's change our keys to msig associated accounts.
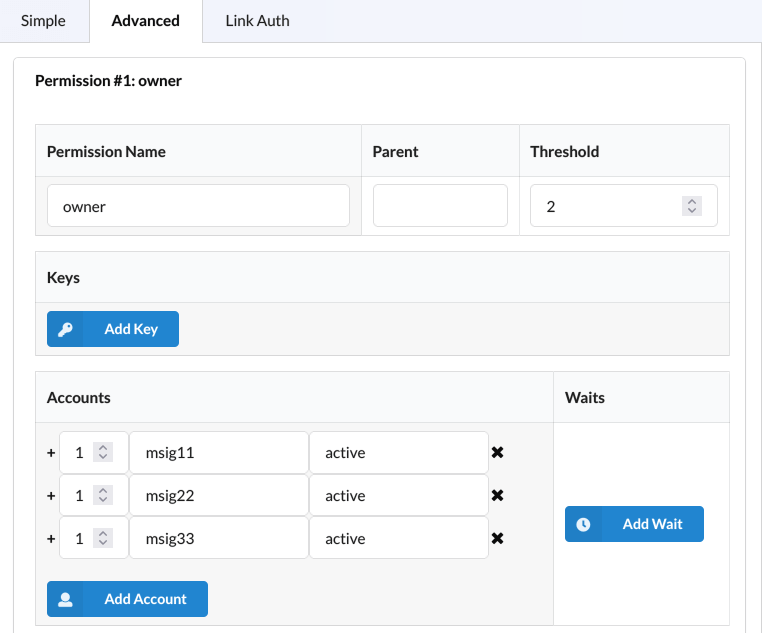
Again navigate to Wallet - Keys and Permissions and choose Advanced mode. First we will change active permission by removing associated keys (click on X to remove it). Set threshold to 2 - this will mean that any proposal will be approved by 2 of 3 accounts.
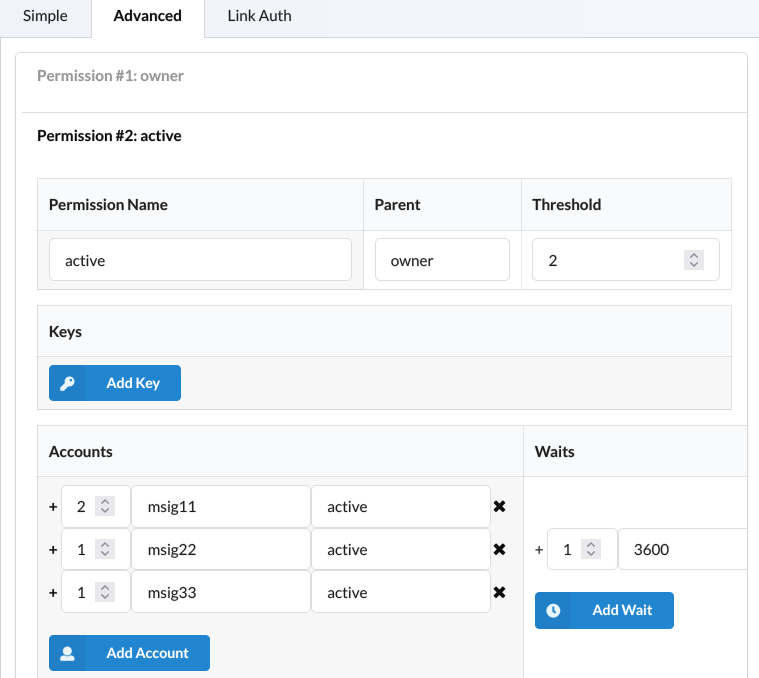
Add accounts down bellow like it is shown on picture. Each account can have weight of 1. For the sake of learning - we dedicated to assign to first account (msig11) weight of 2 - meaning that this account has higher permission and can individually approve any proposal. You can use for all accounts weight of 1.
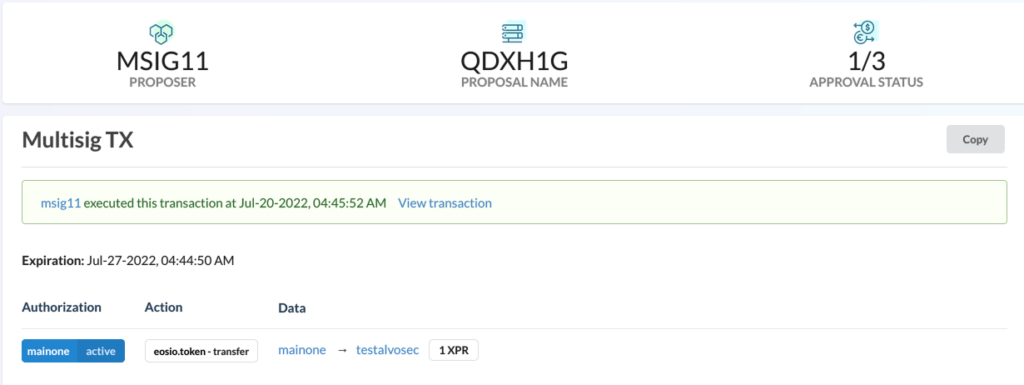
Here is an example of fully executed transaction just by approval of msig11, which holds weight of 2.
Add Waits “Optional”
To the right you will notice the “Add Wait” button which allows you to add “time” as an additional permission for your account if you want. In this example, waiting 3600 seconds (1 hour) will have a weight of 1.
After you are satisfy with your permissions you can save and move to owner permission.
Again each account can have weight of 1 or higher than that. Repeat all the steps by removing key and adding accounts to our new msig wallet.
Our new permissions should look like this:
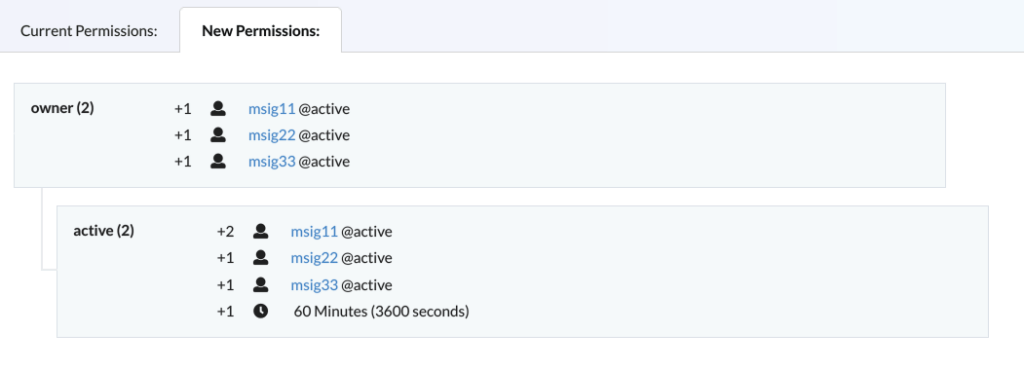
We have changed our account to fully msig account - meaning that any action from this account will need two of three approvals to create any action and execute it.
In this example we've changed our account to fully msig - meaning that any action from this account will need 2 of 3 approvals to create any action and execute it.
(Caution: This is just a demonstration; it is not recommended to store keys of multisig accounts on a server!)
We created an msig proposal for transferring funds from a multisig account to another account, approved 2/3, and executed the transfer. 1/3 will not work, since we've set threshold to 2.
Msig account can be created in various ways, some msig accounts will leave owner key and change only active permissions.
In next tutorial we will explain how to make msig transactions, until then feel free to ask any question related to creation of msig account.